|  | | | |  | |  |  | |  | |  |  | |
| Was this helpful? |
| Yes |
|
100% |
[ 6 ] |
| No |
|
0% |
[ 0 ] |
|
| Total Votes : 6 |
|
| |  |  | | | |  |  |
| | | | | | | | | Co2 Seal Replacement for Crosman 1077 | | | | | |
 Posted: Mon Oct 19, 2009 4:24 pm Posted: Mon Oct 19, 2009 4:24 pm |
 |
|
| yourdaddyjoe |
| Supporting Member |

 |
|
| Joined: 26 May 2008 |
| Posts: 4027 |
| Location: Tatorville, USA |
|
|
|
The most common answer to: "Why does my 1077 leak? & How do I fix it?"
The main Co2 Cart. seal is usualy the issue... They tend to dry out or get cracked from over tightening or removing a partial cart. and freezing the seal...
"How do I avoid it in the first place?"
Use a drop of PellGunOil on the tip of your Co2 Carts often.
It will keep you seal soft and aid in puncturing Co2 carts.
DO NOT GORILLA TIGHTIN THE PEIRCING KNOB!
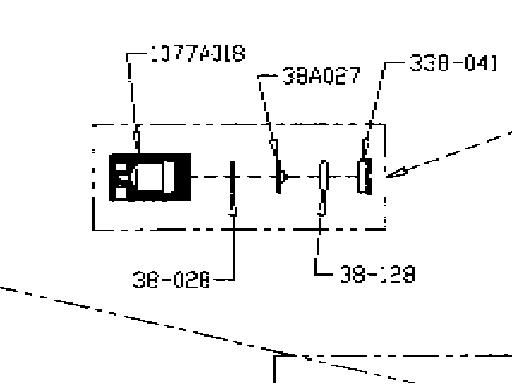
Crosman Part # 38-128
Customer Service:
1-800-7AIRGUN (724-7486)
Changing out this seal does not require total disassembly of the air rifle..
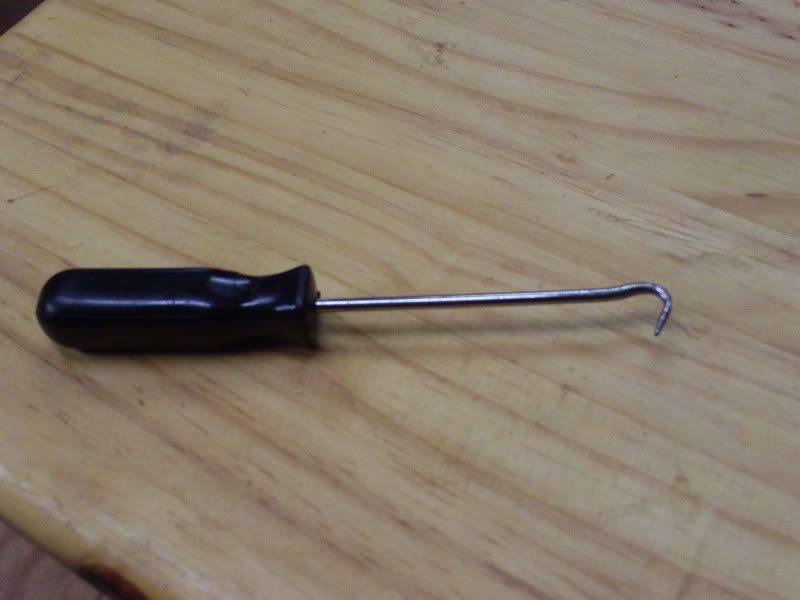
Tools needed:
Bent Pick
#2 Philips screw driver
First and formost...
Never work on a Loaded or pressureized Air Gun
Remove the following:
#1 Magizine
#2 Co2 Cart
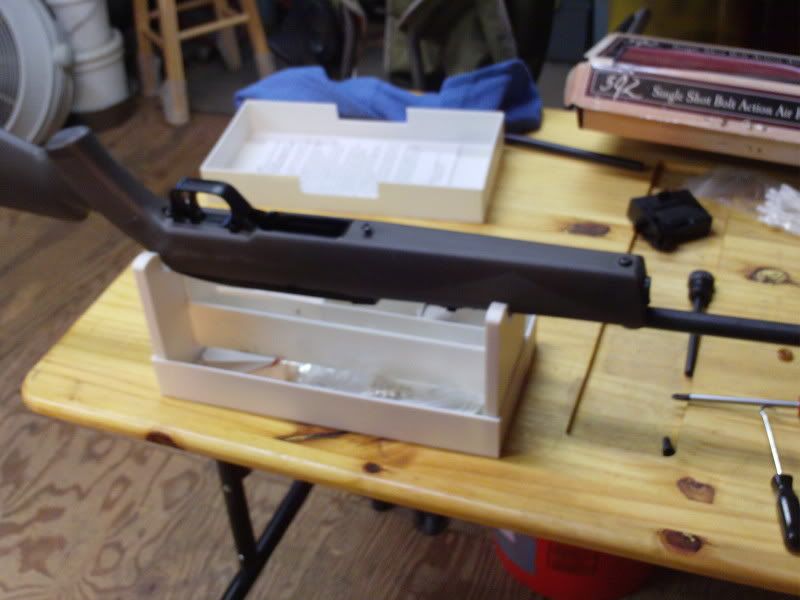
Turn gun upside down...
#3 Three (3) Philips screws in the stock
#4 the stock
There is an access hole in the gas tube that allows changing the seal on the gun with out disasembling the Air Gun.

With the bent pick...
You can place the tip in one of the two (2) groves of the retaining ring.
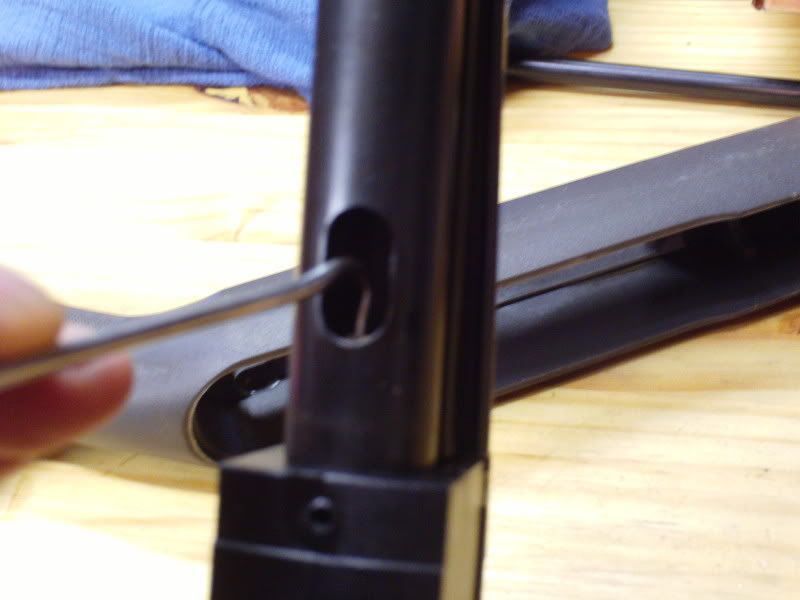
Righty tighty - Lefty loosy...
Work the ring in a counter clock wise turns till the ring is off.
Carefull not to damage the peircing stub in the middle
Remove Ring and seal with pick.
Now is a good time to uses compressed air to clean the screen that is just below the seal. Careful not to blow it out of the gun..
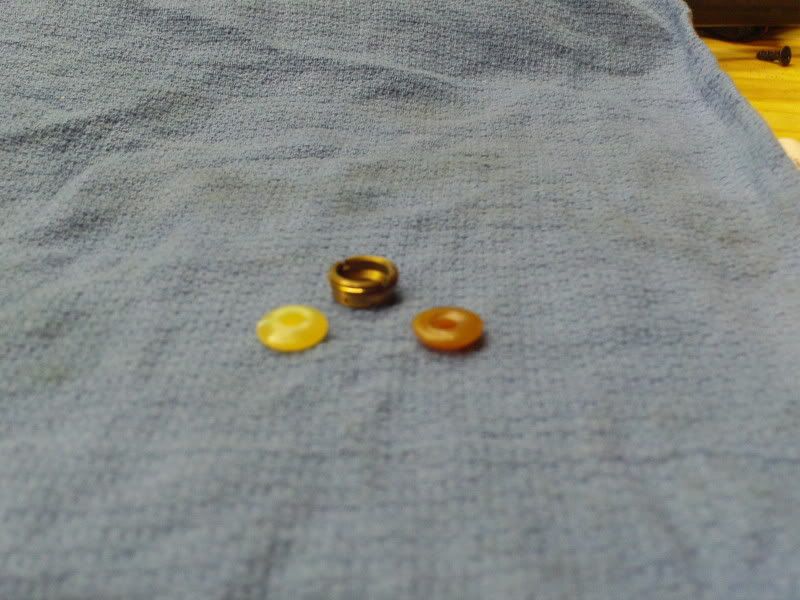
You can see a big difference between the old seal and new...
New on left.
Coat the new seal with PellGunOil...
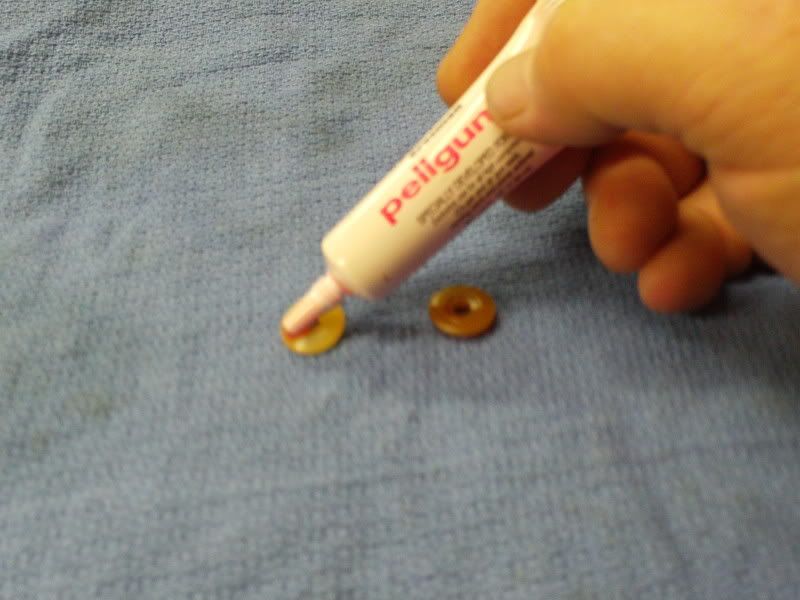
Make sure your screen and peircing stub are back in their proper place.
Assembly is reverse of disassembly...
If this does not fix the issue... Then you have an internal leak and should send it in for repairs.
Internal leaks can be the seal for the tx tube or in the valve.
There are springs and other small parts in the action of the 1077 that tend to fly apart and across the room on disasembly.
I had all ready did my 1077 and should have done a guide some time ago.... Sorry...
Sniper (A.K.A. Snipper) sent his Pre 99 version 1077 up for some trade work... So now I have photos... Thanks Snippy....
If you were one of his pets... you would get "The Snip"... |
|
|
|
|
|
|
| | | | | | | | |
| | | | | | | | | | | | | | |
| Posted: Mon Oct 19, 2009 6:00 pm |
|
|
| sniper |
| Silver Status Member |

 |
|
| Joined: 28 Nov 2008 |
| Posts: 3752 |
| Location: Star, Idaho |
|
|
|
huh.  i can tell you right now i never oiled any of the co2's. i can tell you right now i never oiled any of the co2's.
that makes sense.
that rifle only has max 400-500 shots through it in 13 years.
wadcutter rat euthinizer.   |
|
_________________
I believe in gun control,
If there's a gun around I
want to be controlling it....... |
|
|
|
|
|
| | | | | | | | |
| | | | | | | | | | | | | | |
| Posted: Mon Oct 19, 2009 10:43 pm |
|
|
| yourdaddyjoe |
| Supporting Member |
|
|
| Joined: 26 May 2008 |
| Posts: 4027 |
| Location: Tatorville, USA |
|
|
|
Yea... Snipper, you have bigger issues...
Your valve is done, stuck wide open....
Another issue caused by not oiling up your 1077...
Lucky you I have Re-man here...
I will re-build it and stick it in my parts bins for the next guy... |
|
|
|
|
|
|
| | | | | | | | |
| | | | | | | | | | | | | | |
| Posted: Mon Oct 19, 2009 10:53 pm |
|
|
| Slavia |
| Moderator |

 |
|
| Joined: 31 Mar 2008 |
| Posts: 4382 |
| Location: Waseca, Minnesota, USA |
|
|
|
Good job, Joe.
I don't own a 1077, but your tutorial looks like just what I would want were I to attempt surgery on one. Thanks for your efforts. |
|
_________________
 ¡Listo! ¡Apunte! ¡Fuego! ¡Listo! ¡Apunte! ¡Fuego! |
|
|
|
|
|
| | | | | | | | |
Note: If you are seeing "Please enter your username and password to log in." Your browser cookies have been reset
or you need to register to access the topic in question. Use the 'Register' button near the top left of this page.
|